

How to Felt a Flat Roof With Cold Adhesive
- Elite Asphalt Services.

- Sep 8, 2025
- 10 min read
Are you ready to transform your flat roof with a smooth and durable finish? Learning how to felt a flat roof with cold adhesive can be a game-changer for your home or business.

This technique makes your roof more waterproof. It also provides a lasting and reliable solution without using hot tar or complicated tools. Imagine the peace of mind of knowing your roof is protected from leaks and weather damage.
This guide shows you how to get great results. You'll learn the steps to stay efficient and save money. Get ready for practical tips that will make this project easy and rewarding. Your roof deserves the best, and with cold adhesive felting, you're just a few steps away from achieving it. Curious to find out how you can make this happen? Keep reading to unlock the secrets of a perfectly felted flat roof.
Tools And Materials
Felt roofing with cold adhesive is a strong and lasting choice for flat roofs. A key part of this process is using the right tools and materials. These essentials make installation smooth and effective. They also help your roof last longer. Using the right tools and materials makes the job easier. It also helps you achieve professional results. Below are the necessary items to keep in mind for a successful felting project.
Tools Needed
Utility Knife: Essential for cutting the felt to size. Look for a sharp blade.
Hammer: Use it to secure any loose nails on the roof surface.
Paint Roller: Ideal for spreading the cold adhesive evenly.
Measuring Tape: Ensures accurate dimensions for cutting felt.
Brush: Useful for applying adhesive in tight corners.
Safety Gear: Gloves and goggles for protection.
Materials Required
Material | Description |
Roofing Felt | Waterproof and durable material for covering the roof. |
Cold Adhesive | Bonds the felt to the roof without heat. |
Nails | Galvanised nails prevent rust, securing the felt in place. |
Roof Primer | Prepares the surface for better adhesive bonding. |
Safety Considerations
Safety is crucial in any roofing project. Before starting, ensure you have all safety gear. Gloves protect your hands from adhesive and sharp tools. Goggles shield your eyes from debris. A stable ladder is vital for accessing the roof safely.
Preparing The Roof
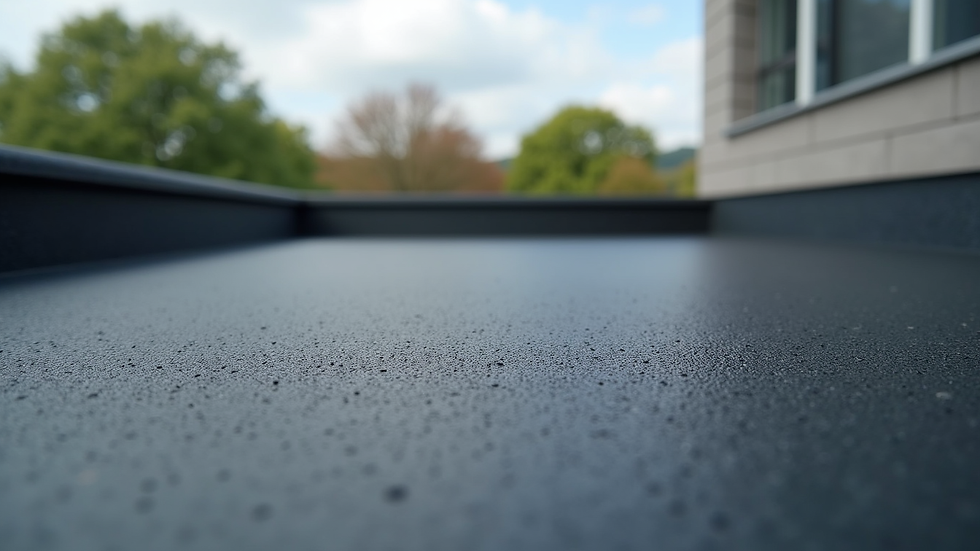
Felt roofing is a common option for flat roofs. It offers a dependable waterproof layer. To achieve the best results when using cold adhesive, proper preparation is crucial. Preparing the roof ensures that the felt adheres properly and lasts longer. This includes a few key steps: cleaning the surface, checking for damage, and fixing any flaws.
Cleaning The Surface
The first step in preparing the roof is to clean the surface thoroughly. This ensures that the adhesive bonds well to the roof. A clean surface is free of dirt, debris, and any other materials that might interfere with adhesion. Begin by removing all loose debris. A stiff broom can be effective for this task.
Clear leaves, branches, and dirt.
Use a pressure washer to remove stubborn grime.
Ensure the surface is completely dry before proceeding.
After sweeping, inspect the roof for any moss or algae. These can be removed using a mild cleaning solution. Scrub gently to avoid damaging the roof. Rinse thoroughly and let the roof dry completely. An absolutely clean surface ensures that the felt sticks properly.
Inspecting For Damage
Once the roof is clean, it's essential to inspect it for any signs of damage. This helps in identifying areas that need repair. Look for cracks, holes, or blisters on the roof's surface.
Check for cracks in the existing felt or surface.
Identify areas with water pooling or stains.
Look for any visible signs of wear or tear.
Use a flashlight to check corners and seams. Pay attention to any unusual dips or bulges. These might indicate underlying issues that need attention. Identifying damage early can prevent more significant problems down the line.
Repairing Imperfections
After identifying any damage, the next step is to repair these imperfections. Proper repairs ensure a smooth surface for the new felt.
Type of Damage | Repair Method |
Cracks | Fill with roof sealant and smooth out. |
Holes | Patch with roof patching material. |
Blisters | Cut, dry, and seal them with adhesive. |
For small cracks, apply a generous amount of roof sealant. Smooth it out with a putty knife. Patching holes requires a more robust material, ensuring it covers the hole completely. For blisters, cut the raised area, allow it to dry, and seal it with adhesive.
Once all repairs are complete, allow everything to dry thoroughly. A well-prepared surface is key to a successful roofing project.
Applying Cold Adhesive
Applying cold adhesive is a key step in felting a flat roof. It ensures a secure and long-lasting bond between the felt layers. This method is preferred for its ease of use and efficiency. Using cold adhesive means you don't need heat. This makes it safer and easier for DIY fans. Understanding the application process is crucial. It means choosing the right adhesive, learning how to apply it, and following safety rules. Let's explore these aspects in detail.
Choosing The Right Adhesive
Selecting the right adhesive is vital for a successful roofing project. The adhesive must be compatible with the type of felt you are using. Here are some key points to consider:
Compatibility: Ensure the adhesive is suitable for your specific roofing material.
Weather Resistance: Select an adhesive that can withstand various weather conditions.
Durability: Opt for a product known for its longevity and strength.
Drying Time: Consider how quickly the adhesive sets to plan your work schedule.
Below is a simple table highlighting popular cold adhesives and their features:
Adhesive Brand | Compatibility | Weather Resistance | Drying Time |
Brand A | All Roof Types | High | 1 Hour |
Brand B | Bitumen Felt | Moderate | 2 Hour |
Application Techniques
Applying cold adhesive requires a careful technique for optimal results. Follow these steps to ensure a smooth application:
Surface Preparation: Clean the roof surface thoroughly. Remove dirt and debris.
Adhesive Application: Use a brush or roller to spread the adhesive evenly. Cover all areas.
Positioning the Felt: Carefully lay the felt over the adhesive. Ensure there are no wrinkles.
Pressing and Smoothing: Use a roller to press the felt into the adhesive. Smooth out any air bubbles.
Drying Time: Allow the adhesive to set according to the manufacturer's instructions.
These steps ensure a strong bond. Proper application reduces the risk of leaks and extends the roof's life.
Safety Precautions
Safety is paramount when working with adhesives. Follow these precautions to ensure a safe working environment:
Ventilation: Work in a well-ventilated area to avoid inhaling fumes.
Protective Gear: Wear gloves and safety glasses to protect your skin and eyes.
Storage: Store adhesive in a cool, dry place. Keep it away from direct sunlight.
Spill Management: Be prepared to clean up spills immediately. Use absorbent materials.
First Aid: Know basic first aid in case of accidental contact with skin or eyes.
Adhering to these precautions minimises risks. It ensures a safe and successful roofing project.
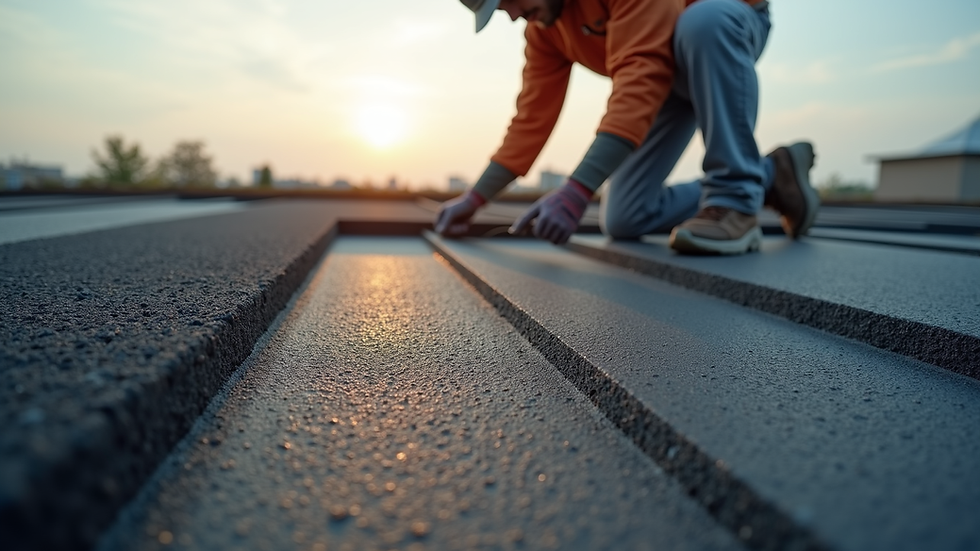
Laying The Felt
Felt roofing is a common option for flat roofs. It's durable and cost-effective. Using cold adhesive to lay the felt makes the process more manageable and safer. This method eliminates the need for hot tar, reducing the risk of burns and fire hazards. Placing the felt right makes sure your roof stays watertight. This protects it from leaks and weather damage. Understanding each step of the process is crucial for a successful installation.
Selecting Felt Type
Choosing the right type of felt is the first step in ensuring a long-lasting roof. Different felts have unique properties that affect their performance. Consider the following types:
SBS Modified Bitumen: This felt is elastic and resistant to temperature changes.
APP Modified Bitumen: Known for its durability and UV resistance.
Traditional Felt: A cost-effective option for smaller projects.
It’s important to select a felt that matches your environmental conditions and budget.
Cutting To Size
Cutting the felt to the correct size is essential for a seamless finish. Follow these steps for precise cutting:
Measure the Roof: Use a tape measure to get the exact dimensions of your roof.
Mark the Felt: Lay the felt on a flat surface and mark it according to your measurements.
Cut with a Sharp Knife: Use a utility knife to cut along the marked lines.
Ensure the felt pieces are slightly larger than the roof dimensions. This allows for overhangs, which are trimmed later for a neat finish. Cutting accurately reduces waste and ensures a snug fit.
Positioning The Felt
Proper positioning of the felt is crucial for effective adhesion. Begin by aligning the felt with the roof edge. Unroll it slowly, checking alignment as you go. Adjust the felt to avoid wrinkles and bubbles. These can cause leaks if left unchecked.
Start at One End: Work from one side of the roof to the other.
Use a Roller: A roller helps smooth the felt and improve adhesion.
Ensure Overlaps: Overlap felt edges by at least 50mm to prevent water penetration.
A well-positioned felt layer forms a solid base for additional layers. This enhances the roof's durability and weather resistance. Take your time with this step to ensure a professional finish.
Securing The Felt
Felt roofing is a popular choice for flat roofs due to its durability and ease of application. Using cold adhesive to secure the felt can be an efficient and effective method. Properly securing the felt ensures a long-lasting, weather-resistant roof. Below are some key steps to follow to make sure the felt is properly secured.
Pressing Down
Pressing down the felt is crucial to ensure a strong bond with the adhesive. This step helps eliminate air pockets and ensures full contact between the felt and the roof.
Here’s how to do it:
Use a heavy roller: A weighted roller applies even pressure across the felt, ensuring it sticks well.
Work from the centre outwards: This technique helps push out any trapped air towards the edges.
Check for uniformity: Ensure the entire surface is uniformly pressed down, as inconsistent pressure can lead to weak spots.
Remember, the goal is to achieve a smooth, even surface without any wrinkles or gaps. Consistent pressure is key.
Sealing Edges
Proper edge sealing prevents water ingress and ensures the longevity of the roof. Sealing edges involves careful attention to detail.
Steps to follow:
Apply additional adhesive: Use a brush to apply extra adhesive along the edges.
Press edges firmly: Use your hands or a roller to ensure the edges are securely attached.
Check for gaps: Inspect the edges for any gaps or loose areas. Press down again if necessary.
Sealing the edges well can prevent costly repairs in the future. It’s a small effort that yields significant benefits.
Checking For Bubbles
Bubbles can compromise the integrity of the roof. Checking for and removing bubbles ensures the felt adheres properly.
Follow these steps:
Inspect the entire surface: Look for any raised areas or inconsistencies.
Use a sharp tool: Gently puncture any bubbles to release trapped air.
Press down the area: Use a roller to flatten the area and ensure it adheres well.
Performing these checks prevents future issues and maintains the roof’s durability. Bubbles are more than cosmetic; they can lead to leaks.
Maintenance Tips
Maintaining a flat roof felt with cold adhesive requires attention and care. Proper maintenance ensures longevity and prevents costly repairs. Regular inspections, cleaning, and quick repairs are key for a great roof. This guide offers key tips for keeping your felted roof in top shape. It helps ensure your roof stays strong and works well.
Regular Inspections
Regular inspections are vital for any flat roof. They help identify potential issues before they become serious problems. Conducting thorough checks at least twice a year is recommended.
Check for leaks: Look for any signs of water pooling or dripping.
Inspect joints and seams: Ensure they are intact and not separating.
Examine for tears: Small tears can lead to bigger issues if not addressed.
Using a table can help organise your inspection routine:
Inspection Area | Frequency | Action Required |
Roof Surface | Bi-annual | Check for cracks and tears |
Flashings | Quarterly | Ensure secure attachment |
Gutters | Monthly | Clear debris |
Cleaning Guidelines
Proper cleaning keeps your roof free from debris and prevents damage. Accumulated dirt and leaves can obstruct water flow.
Remove debris: Clear leaves, branches, and dirt regularly.
Clean gutters: Ensure unobstructed water flow.
Use gentle cleaners: Avoid harsh chemicals that can damage the felt.
Cleaning frequency varies based on location and weather conditions. A monthly cleaning routine can help maintain optimal condition.
Tools Required:
Broom or leaf blower
Garden hose
Non-abrasive cleaner
Repairing Damage
Timely repairs prevent small issues from escalating. Addressing damage quickly ensures the roof remains functional.
Common Repairs:
Fix tears: Use patch kits to seal small tears.
Seal leaks: Apply cold adhesive to leaking areas.
Replace damaged sections: Cut out and replace severely damaged felt.
Steps to Repair:
Identify the damaged area.
Clean the surface thoroughly.
Apply a patch or adhesive.
Allow it to cure completely.
Regular monitoring and quick action are key to maintaining the integrity of your felted flat roof.
Reach out to our team for support or inquiries about how to Felt a Flat Roof With Cold Adhesive
Just gather your tools, follow the steps, and take your time. Cold adhesive is clean, quick, and gives you a roof that lasts.
Stay safe — wear gloves and protect your eyes. Once it's done, check your roof now and then to keep it in good shape.
Be proud — you’ve done something great!
Need help? Elite Asphalt Services is here for you. Just give us a call — we’re happy to help!
All You Need to Know
How Do You Stick Felt To A Flat Roof?
Clean the roof surface thoroughly. Apply a layer of roofing adhesive evenly. Position the felt carefully, pressing it firmly into the adhesive. Use a roller to ensure full adhesion and remove air bubbles. Seal the edges securely with adhesive or nails for extra strength.
Is Self-adhesive Roof Felt Any Good?
Self-adhesive roof felt is reliable and easy to install, offering strong waterproofing and durability. It eliminates the need for additional adhesives, saving time and effort. This type of roof felt is ideal for quick repairs and small projects. Its versatility makes it a popular choice among DIY enthusiasts and professionals.
How Many Layers Of Felt Should A Flat Roof Have?
A flat roof typically requires two to three layers of felt for optimal protection. Ensure proper installation to prevent leaks and enhance durability. Use quality materials for long-lasting results. Consult with roofing professionals for specific recommendations tailored to your project.
Regular maintenance can extend the life of your flat roof.
How To Use Self-adhesive Roofing Felt?
Clean the roof surface thoroughly. Measure and cut the roofing felt to fit. Peel off the backing paper. Carefully press the felt onto the roof, ensuring no air bubbles form. Use a roller to smooth it out for a secure bond.
Always follow the manufacturer's instructions for best results.

Comments