

Is it possible to apply new felt over old felt on a shed roof?
- Elite Asphalt Services.

- Dec 2, 2024
- 13 min read
Updated: Dec 11, 2024
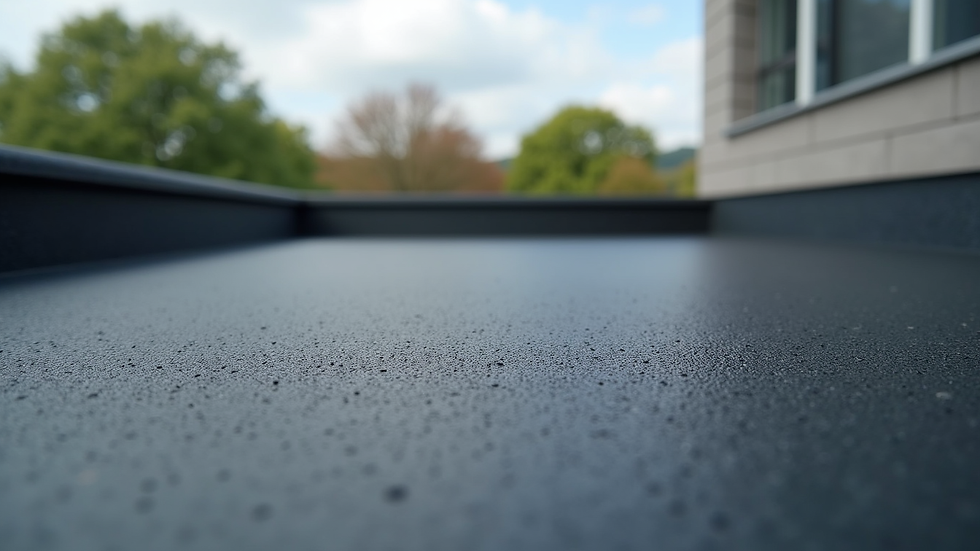
Yes, you can felt over old felt on a shed roof. But, it is not always the best idea.

Felting over old felt might seem like a quick fix. It can save time and effort. But there are some things to think about first. The condition of the old felt is key. If it is in good shape, adding new felt on top might work.
But if the old felt is damaged, it could cause problems. Moisture and rot can spread, damaging your shed. So, it is important to check the old felt well before making a decision. This blog will guide you through the pros and cons, helping you make the best choice for your shed roof.
Benefits of Felt Roofing
Felt roofing is a popular choice for sheds due to its affordability and ease of installation. Many wonder if they can lay new felt over old felt on a shed roof. The short answer is yes, but there are benefits to consider. Felt roofing offers several advantages that make it a reliable option for shed roofs. Below, we explore the key benefits of felt roofing.
Durability and Longevity
Felt roofing is known for its durability and long lifespan. This makes it a great choice for sheds. Here's why:
Robust Material: Felt is made from layers of durable materials, often reinforced with polyester or fiberglass.
Multiple Layers: Adding layers of felt can extend the life of the roof. Each layer acts as a protective barrier.
Resistance to Wear and Tear: Felt can withstand significant wear and tear. This includes foot traffic and minor impacts.
Felt roofing can last up to 15 years with proper maintenance. Regular checks and occasional repairs can prolong its life even further. Here's a quick overview:
Type of Felt | Average Lifespan |
Standard Felt | 5-10 years |
High-Performance Felt | 10-15 years |
Overall, felt roofing provides a cost-effective and long-lasting solution for shed roofs. Its durability ensures that your shed remains protected for many years.
Weather Resistance
One of the significant benefits of felt roofing is its weather resistance. This quality is crucial for protecting shed contents from the elements:
Waterproof: Felt roofing is designed to be waterproof, preventing leaks and water damage.
UV Resistance: Felt roofs can resist the harmful effects of UV rays, reducing the risk of degradation.
Wind Resistance: Properly installed felt can withstand strong winds, keeping the roof intact during storms.
Felt roofs are particularly effective in rainy and snowy conditions. They help prevent water penetration and protect the shed's interior.
Felt roofing ensures your shed remains dry and secure, regardless of the weather. Its resilience against harsh conditions makes it a reliable choice for shed roofs.

Types Of Roofing Felt
To know if you can felt over old felt on a shed roof, you must understand the different types of roofing felt. Roofing felt protects your roof from harsh weather. It also extends its life. There are various types of roofing felt, each with its unique features and benefits. Let's dive into the most common types: Asphalt Felt and Synthetic Felt.

Asphalt Felt
Asphalt felt, often called "tar paper," is a traditional roofing material. It is widely used due to its affordability and ease of installation. Made from a base of organic or fiberglass material, it is saturated with asphalt to make it waterproof.
Advantages of Asphalt Felt:
Cost-effective
Easy to install
Readily available
Asphalt felt comes in different thicknesses, commonly 15-pound and 30-pound varieties. The thicker the felt, the more durable it is.
Type | Thickness | Durability |
15-pound | 0.45 mm | Moderate |
30-pound | 0.90 mm | High |
Drawbacks of Asphalt Felt:
Heavy
Not environmentally friendly
Can tear in extreme weather
Asphalt felt is suitable for many roofing projects. Its affordability and availability make it a popular choice among homeowners.
Synthetic Felt
Synthetic felt is a modern alternative to traditional asphalt felt. Made from woven polyethylene or polypropylene, it offers several advantages over its asphalt counterpart.
Benefits of Synthetic Felt:
Lightweight
High tear resistance
Long-lasting
Synthetic felt is typically more expensive but offers superior performance. It is resistant to mould and UV damage, making it ideal for various climates.
Limitations of Synthetic Felt:
Higher cost
Less traditional appearance
Synthetic felt provides superior protection and durability. It is an excellent choice for long-term roofing projects despite its higher cost.
Assessing Old Felt
Introduction paragraph about Can You Felt Over Old Felt on a Shed Roof and Assessing Old Felt...
Before deciding to felt over old felt on a shed roof, assessing the current condition of the old felt is crucial. The old felt may show signs of wear or damage that could affect the new layer's effectiveness. This assessment ensures that the shed roof remains durable and weatherproof for years to come.
Signs Of Wear
Inspecting the old felt for signs of wear is the first step. Look for the following indicators that the felt may need replacement:
Tears and Rips: Small tears can grow larger over time, allowing water to seep through.
Cracks: Cracks in the felt often indicate that the material has become brittle due to weather exposure.
Discoloration: Faded or discoloured areas might suggest UV damage or water absorption.
Moss and Algae: These can retain moisture, leading to rot and further weakening the felt.
Here is a simple table summarising the signs of wear:
Sign of Wear | Description |
Tears and Rips | Small tears that can expand, allowing water entry. |
Cracks | Indicates brittleness and possible weather damage. |
Discoloration | Suggests UV damage or water absorption issues. |
Moss and Algae | Can retain moisture, causing rot. |
If you notice any of these signs, repairing or replacing the old felt might be necessary before adding a new layer.

Structural Integrity Check
Beyond the visible signs of wear, checking the shed’s structural integrity is essential. This ensures the roof can support the new felt layer without any underlying issues.
Consider the following points during your structural integrity check:
Wood Rot: Inspect the wooden framework for any signs of rot or decay. Soft or spongy wood might indicate damage that needs fixing.
Loose Nails or Screws: Ensure all nails and screws are tight. Loose fasteners can weaken the roof structure.
Roof Sagging: Check for any sagging areas on the roof. This could be a sign of structural damage that needs attention.
Water Damage: Look for stains or watermarks on the underside of the roof. This can indicate leaks that need to be addressed.
Here is a checklist to help with the structural integrity check:
Inspect wooden framework for rot or decay
Ensure all nails and screws are tight
Check for roof sagging
Look for water stains or marks
Addressing any structural issues before adding a new felt layer ensures the roof remains strong and weather-resistant.
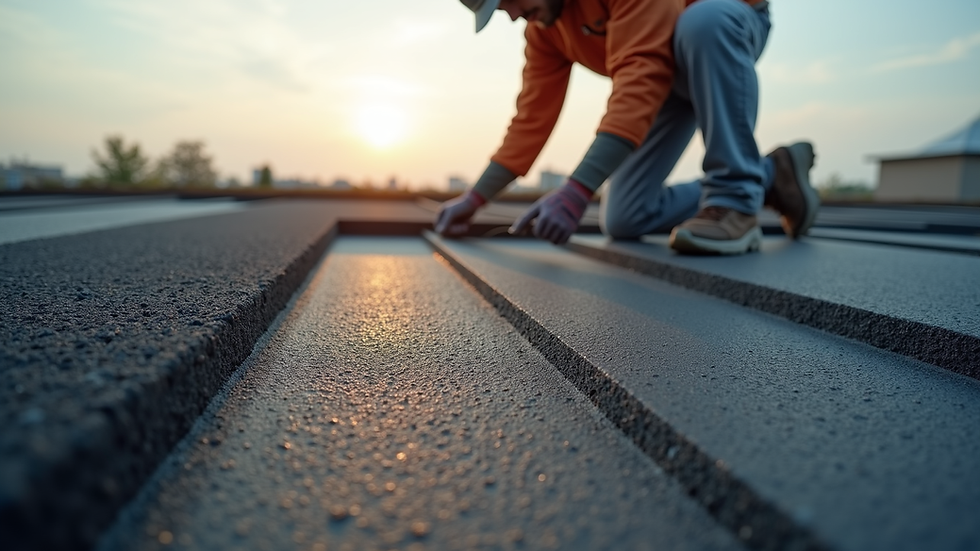
Preparation Steps
When considering whether to felt over old felt on a shed roof, proper preparation is key. The steps will help the new felt stick and last. This guide will show you how to prepare your shed roof for new felt.
Cleaning The Surface
Before you start felting over old felt, it's crucial to clean the surface thoroughly. A clean surface ensures better adhesion and longevity of the new felt.
Here are the steps to clean the surface:
Remove Debris: Begin by clearing away loose debris such as leaves, twigs, and dirt. Use a broom or a leaf blower for this task.
Sweep the Roof: Sweep the entire surface of the roof to remove finer particles and dust. Pay special attention to corners and edges where dirt tends to accumulate.
Inspect for Mould or Moss: Check the roof for any signs of mold or moss. Use a stiff brush to scrub away these growths. If necessary, apply a mild bleach solution to kill mould spores.
Rinse with Water: Rinse the roof with a hose to remove any remaining dirt and cleaning solution. Allow it to dry completely before proceeding.
A clean surface is essential for the new felt to adhere properly, ensuring your shed remains weatherproof and durable.

Repairing Damaged Areas
Address any damage to the existing felt or roof structure before applying new felt. This step is vital to prevent future leaks and ensure a smooth application.
Follow these steps to repair damaged areas:
Identify Damage: Inspect the old felt for tears, holes, or worn-out areas. Also, check the underlying roof structure for any signs of rot or damage.
Patch Holes and Tears: Use roofing adhesive and patches to repair small holes or tears in the felt. For larger areas, consider replacing the damaged section entirely.
Replace Rotten Wood: If you find any rotten wood in the roof structure, remove and replace it with new, treated wood. Secure it properly to ensure a stable base for the new felt.
Seal Edges and Seams: Ensure all edges and seams are well-sealed. Use roofing tape or adhesive to secure any loose edges and prevent water ingress.
Repairing damaged areas ensures the integrity of your shed roof and provides a solid foundation for the new felt.
Garden Shed Felt London
If you are in London and need high-quality felt for your garden shed, several local suppliers offer durable and weather-resistant options. Choosing the right felt is crucial for protecting your shed from the elements.
Consider the following tips when selecting garden shed felt in London:
Check Local Suppliers: Look for reputable suppliers in London who specialize in roofing materials. They often have a range of options suitable for various needs and budgets.
Quality of Felt: Ensure the felt you choose is of high quality. Look for features such as UV resistance, waterproofing, and durability to withstand London's weather conditions.
Thickness: Opt for a thicker felt for better protection and longevity. Thicker felt is more resistant to wear and tear and provides better insulation.
Installation Services: Some suppliers offer installation services. Hiring a professional can ensure the felt is applied correctly, providing optimal protection for your shed.
Investing in quality garden shed felt in London will extend the life of your shed and keep your belongings safe from the weather.
Felt Layers And Installation
To maintain your shed roof, you must understand felt layers and installation. One common question is whether you can felt over old felt. Knowing how to properly install and layer felt can save time and ensure a durable roof. Let's dive into the details of felt layers and installation.
Single Layer Vs. Double Layer
Choosing between a single layer and a double layer of felt depends on several factors. A single layer of felt is often enough for smaller sheds or those in mild climates. It provides basic protection against water and weather.
Cost-effective
Easier and quicker to install
Suitable for light-duty sheds
Less durable over time
May not handle heavy rain or snow well
On the other hand, a double layer of felt offers more durability and protection. It is ideal for larger sheds or those exposed to harsh weather conditions. This method involves laying one layer of felt over another, providing added strength and water resistance.
Increased durability
Better protection against leaks
Suitable for heavy-duty sheds
More expensive
Takes longer to install
Requires more materials
Deciding on the number of felt layers depends on your specific needs. Consider the size of your shed, local weather, and budget.
Proper Overlap Techniques
Proper overlap techniques are essential for effective felt installation. Overlapping ensures that water does not seep through the seams and damage the roof.
Start at the bottom edge of the roof.
Lay the first strip of felt horizontally.
Ensure the felt extends past the edge of the roof by at least 2 inches.
Lay the next strip above the first, overlapping by at least 3 to 4 inches.
Continue this process, moving upward.
Use roofing nails or staples to secure the felt.
Make sure there are no gaps between strips.
Press down firmly to ensure a tight seal.
Properly overlapping felt layers is crucial for preventing leaks. It also extends the life of the shed roof. Always check for any loose edges or gaps after installation.
In summary, understanding the differences between single and double layers, along with mastering proper overlap techniques, ensures a sturdy and long-lasting shed roof. Take the time to install felt correctly for the best protection against the elements.
Tools And Materials Needed
Replacing the felt on a shed roof can seem daunting, especially if there is old felt already in place. Before starting the project, it is important to have the right tools and materials. This ensures a smooth and efficient process. The right tools and supplies ensure the new felt adheres. They also protect your shed.
Essential Tools
To successfully felt over old felt on a shed roof, you need several essential tools. These tools make the job easier and help you achieve professional results.
Utility Knife: A sharp utility knife is crucial for cutting the felt to the correct size. It allows you to make precise cuts, ensuring a snug fit.
Hammer or Staple Gun: You will need a hammer or staple gun to secure the felt to the roof. Staples provide a firm hold, while nails can be used for extra security.
Measuring Tape: Accurate measurements are vital. A measuring tape helps you measure the roof and cut the felt to the required dimensions.
Chalk Line: A chalk line helps you draw straight lines on the roof. This ensures the felt is laid evenly.
Roofing Brush: Use a roofing brush to clean the old felt and remove any debris. This ensures the new felt adheres properly.
Safety Gear: Always wear gloves and safety goggles. This protects your hands and eyes from potential injuries.
Recommended Materials
Choosing the right materials is just as important as having the right tools. The quality and type of materials you use affect the longevity and effectiveness of your shed roof.
Roofing Felt: Opt for high-quality roofing felt. It should be durable and weather-resistant. This ensures it can withstand various weather conditions.
Roofing Nails or Staples: Use galvanised roofing nails or staples. These are resistant to rust and provide a strong hold.
Roofing Adhesive: Roofing adhesive is essential for securing the felt. Choose a high-quality adhesive for a strong bond.
Roofing Tape: Use roofing tape to seal the edges and seams. This prevents water from seeping through.
Underlay: Consider using an underlay for extra protection. It provides an additional barrier against moisture.
Here is a quick reference table for the recommended materials:
Material | Purpose |
Roofing Felt | Primary roof covering |
Roofing Nails or Staples | Securing felt |
Roofing Adhesive | Bonding felt |
Roofing Tape | Sealing edges and seams |
Underlay | Additional moisture barrier |
Common Mistakes To Avoid
Re-felting a shed roof can extend its life and protect the contents inside. But, can you felt over old felt on a shed roof? Many people make common mistakes that can lead to problems down the line. Let's explore these mistakes and how to avoid them.

Ignoring Moisture Traps
One of the biggest mistakes is ignoring moisture traps. Moisture can get trapped between the old and new felt layers. This can cause mould, rot, and leaks over time. Proper moisture control is crucial for a durable roof.
Here are some common moisture traps to watch out for:
Holes and Tears: Check the old felt for holes and tears. Even small holes can let moisture in.
Condensation: Condensation can build up if the shed is not well-ventilated.
Pooling Water: Water can pool in low spots, especially if the roof is flat or poorly angled.
To avoid these traps:
Inspect the old felt carefully. Look for any signs of damage or wear.
Ensure the shed has proper ventilation. This helps reduce condensation.
Fix any structural issues that cause water to pool on the roof.
Ignoring these moisture traps can lead to bigger problems. Be proactive and address these issues before adding new felt.
Skipping Surface Preparation
Another common mistake is skipping surface preparation. Proper surface preparation ensures the new felt adheres well and lasts longer.
Important steps in surface preparation include:
Cleaning: Remove dirt, debris, and any loose felt. A clean surface ensures better adhesion.
Repairing: Fix any damaged areas. This includes patching holes, smoothing rough spots, and replacing rotten wood.
Priming: Apply a primer if needed. This helps the new felt stick better.
Skipping these steps can lead to poor adhesion and faster wear. Always prepare the surface properly before adding new felt.
Maintenance Tips
Maintaining the felt on your shed roof ensures longevity and protection. Proper maintenance helps prevent leaks and damage. This guide provides essential maintenance tips for your shed roof felt.
Regular Inspections
Regular inspections are crucial for a healthy shed roof. Check your roof at least twice a year. Doing so helps you catch problems early. Follow these steps for effective inspections:
Check for Tears and Holes: Look for any visible damage. Small tears can become big problems.
Examine the Edges: Edges are prone to lifting. Ensure they are secure and sealed properly.
Inspect for Water Pooling: Water pooling can lead to leaks. Ensure your roof is sloped correctly.
Look for Mould and Algae: Mould and algae indicate moisture problems. Address these issues immediately.
Cleaning And Repairing
Cleaning and repairing your shed roof felt keeps it in top condition. Dirt and debris can cause damage over time. Follow these steps to clean and repair your felt roof:
Remove Debris: Use a broom or leaf blower to clear leaves, twigs, and dirt.
Clean the Surface: Wash the roof with mild detergent and water. Use a soft brush for stubborn dirt.
Inspect for Damage: After cleaning, inspect for any new damage.
Repair Small Tears: Use roofing adhesive for small tears. Apply it under the tear and press the felt down firmly.
Replace Damaged Sections: For large damages, cut out the damaged area. Replace it with new felt, ensuring overlap with the existing felt.
Seal Edges: Use roofing sealant to secure edges and seams. This prevents water from getting under the felt.
Regular cleaning and timely repairs extend the life of your shed roof. They also prevent costly future repairs.
Contact Us Today
Re-felting over old felt on a shed roof is possible if the existing felt is in good condition. First, remove any loose or damaged parts. Then, clean the surface well for proper adhesion. Using quality materials is key to achieving the best results. Proper installation not only prevents leaks but also extends the life of your shed roof.
If you're unsure about the process or want a professional touch, Bell Asphalt Co. is here to help! Consulting experts like us can save you time and money. We will ensure a durable, reliable finish. Keep your shed dry, protected, and looking great with our expert services.
For inquiries or to schedule a consultation, contact Bell Asphalt Co. today. Happy roofing!
Common Questions About Can You Felt Over Old Felt on a Shed Roof
Can You Felt Over Old Felt On A Shed Roof?
Yes, you can put new felt over old felt on a shed roof, but check a few things first! Make sure the old felt isn’t torn or badly damaged. If it is, you might need to take it off and start fresh.
If the old felt looks okay, clean it well to remove dirt and loose bits. This helps the new felt stick better and keeps your shed dry. Use good roofing glue or bitumen for a strong bond.
If you're not sure what to do, ask a professional for help. They can make sure your roof stays in great shape!
What Are The Benefits Of Felting Over Old Felt?
Felting with wool is a fun and creative way to make soft and colourful items. You can create all kinds of patterns and designs, making every piece unique. Wool felt is softer and feels nicer than some older, stiff types of felt.
It’s also strong and lasts a long time. The fibres are tightly packed, which prevents easy wear. This makes it great for clothes, bags, rugs, or decorations.
Felting lets you make things that are both pretty and useful!
How Do You Prepare The Old Felt?
Reusing old felt can be a fun project! Begin by cleaning it with care. Use a soft brush or lint roller to get rid of dust. If it’s very dirty, wash it by hand using cold water and a small amount of detergent. Don’t twist or wring it—lay it flat on a towel to dry.
Check for holes or frayed edges. You can fix small tears with fabric glue or a needle and thread. For bigger damage, add a patch of similar fabric.
If you find the felt wrinkled, you can gently apply steam, but be careful with the heat. Now your felt is ready to use again!
Do I Need To Repair Old Felt Before Overlaying?
Before you add new felt over old felt, check whether the old felt has any damage. Fixing tears or worn-out parts first makes the roof stronger and helps prevent leaks.
Patching or replacing bad spots keeps the roof dry and lasts longer. Taking time to repair now saves you money and trouble later!

Comments